Why Cutting Curly Hair Is Different from Straight Hair
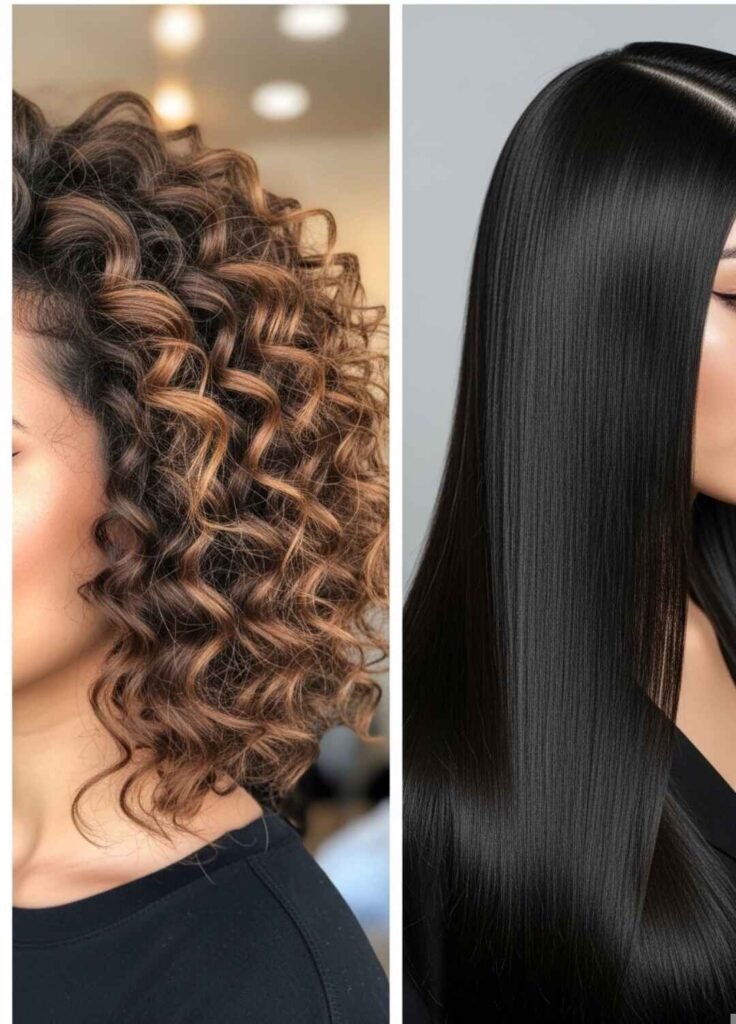
Curly hair behaves completely differently from straight hair. Each curl has its own personality. Some spring up tight, others hang loose. This means you can’t cut curls the same way you’d cut straight hair.
When you cut straight hair, you can see exactly where the line will fall. But curls shrink up after you cut them. A curl that looks shoulder-length when wet might bounce up to your chin when dry. This shrinkage can surprise you if you’re not ready for it.
Curls also stack on top of each other in unique ways. If you cut them all the same length, you might end up with a pyramid shape. The key is cutting in a way that respects each curl’s natural pattern and creates a balanced shape.
Understanding shrinkage is crucial. Type 3 curls might shrink twenty to thirty percent. Type 4 coils can shrink fifty percent or more. This means if you want shoulder-length hair when dry, you need to cut it several inches past your shoulders when wet.
That’s why the techniques in this guide focus on working with your curls, not against them. You’ll cut curl by curl, which gives you much more control and better results.
Gathering Your Tools: What You Actually Need

Before you start snipping, gather the right tools. Using regular household scissors is a mistake that leads to split ends and uneven cuts. Here’s what you actually need.
First, get proper hair cutting scissors. They’re sharper than regular scissors and create clean cuts that won’t damage your hair. You can find decent ones online for around twenty to thirty dollars. Look for scissors that are at least five to six inches long. The blades should be sharp and close together smoothly.
You’ll also need a spray bottle filled with water. Curly hair cuts work best when your hair is damp, not soaking wet. The spray bottle lets you refresh sections as you work. Add a tiny bit of conditioner to the water if you want extra slip.
Grab some hair clips to section your hair. You’ll be working on small sections at a time, so clips keep everything organized. Four to six clips should be enough for most people. Metal clips with teeth work better than claw clips because they hold tighter.
A wide-tooth comb or your fingers work for detangling. Never use a brush on dry curls. It breaks up the curl pattern and creates frizz. If you have very tight curls, your fingers might work better than any comb.
Finally, have a mirror set up where you can see the back of your head. A handheld mirror plus a wall mirror works perfectly. You need to see all angles of your head to create an even cut. Good lighting matters too. Natural light near a window is ideal.
Preparing Your Hair: The Foundation of a Good Cut
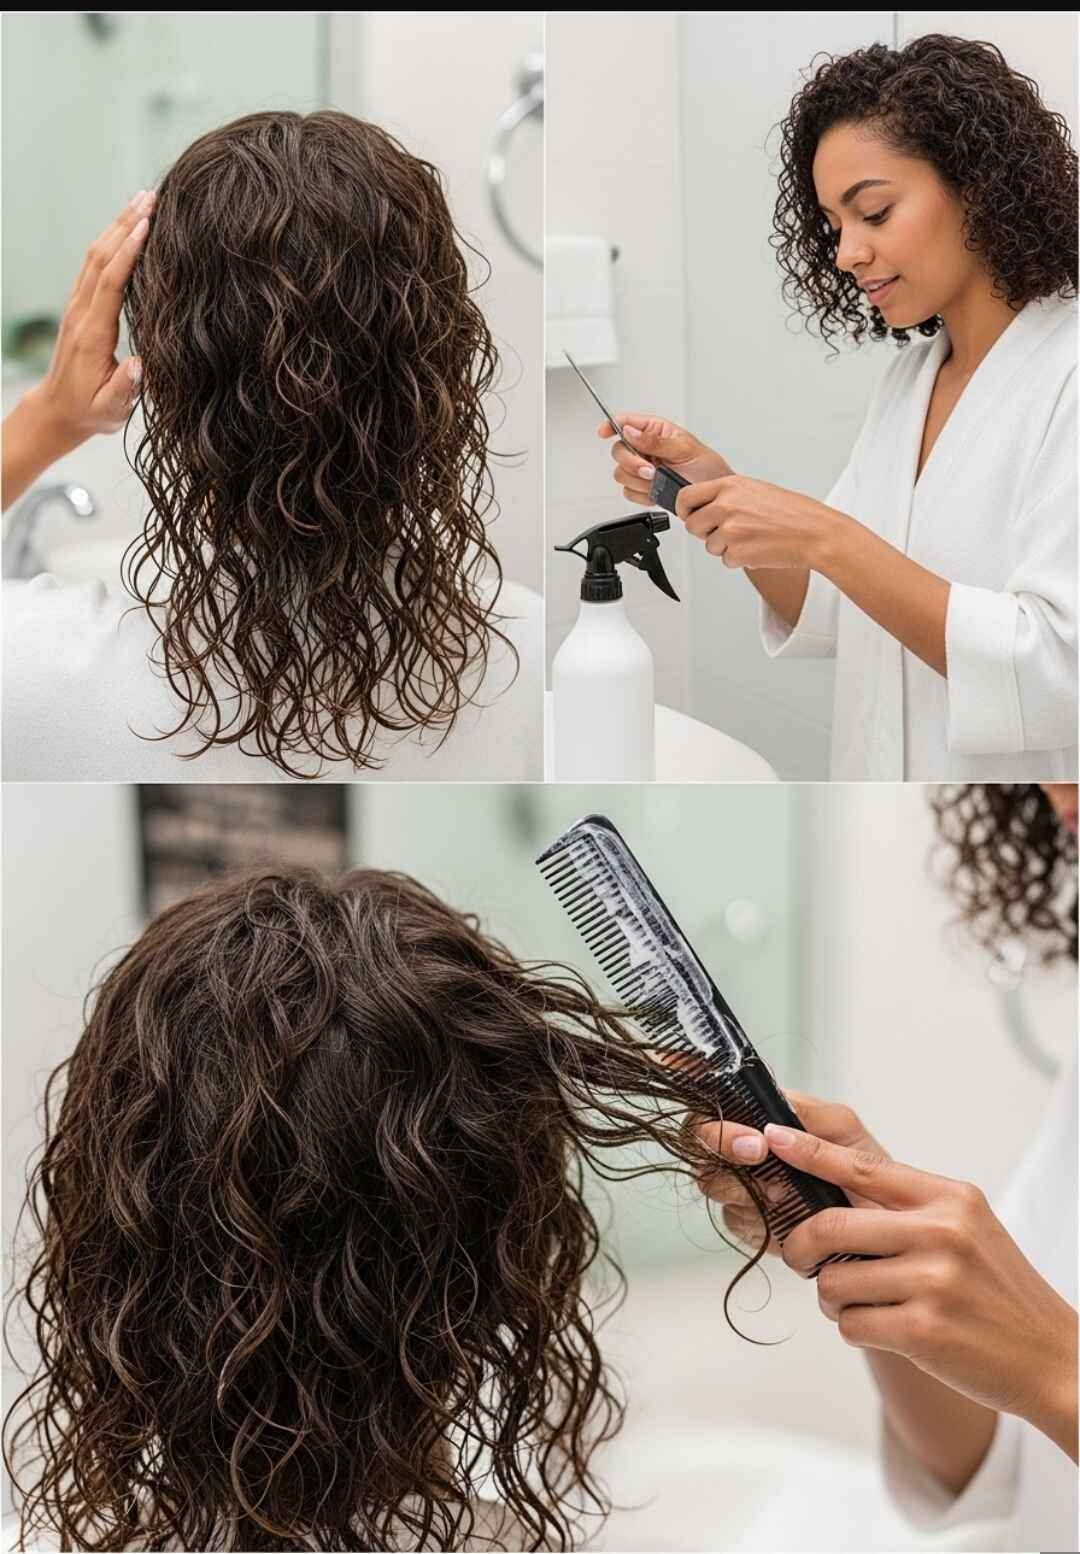
Preparation makes the difference between a good cut and a disaster. Start with clean, conditioned hair. Your curls should be in their natural state, not stretched or manipulated.
Wash your hair like normal, then apply your usual conditioner. This helps your curls form their natural pattern. You want to see how your hair actually behaves before you cut it. If you normally use a styling product, skip it for now. You need to see your raw curl pattern.
Don’t dry your hair completely. Damp hair is easier to cut than bone-dry hair. If your hair dries while you’re working, just spritz it with your water bottle. The goal is hair that’s damp enough to stretch slightly but not dripping wet.
Detangle gently with your fingers or a wide-tooth comb while the conditioner is still in. Work from the ends up to the roots. This prevents breakage and helps you see the true length of each curl. Take your time here. Rushing through detangling can cause unnecessary hair loss.
Once your hair is detangled and damp, shake it out and let your curls form naturally. Don’t rake your fingers through them. Just let them clump together the way they want to. This shows you the natural sections and curl families in your hair.
Now find a comfortable place to work. You’ll be here for a while, so sit somewhere with good back support. Have all your tools within easy reach. Put on some music or a podcast if that helps you relax. Take a deep breath. You’ve got this.
The Unicorn Cut Method: Simple and Effective
This is one of the most popular methods for cutting curly hair at home. It’s simple, effective, and creates beautiful layers without complicated techniques. If you’ve never cut your own hair before, start here.
Flip your head upside down and gather all your hair into a high ponytail right at your forehead. It should look like a unicorn horn sticking straight up. This is where the name comes from. Make sure all your hair is in the ponytail and it’s pulled straight up, not tilted forward or back.
The position matters. If your ponytail tilts toward your face, you’ll have shorter layers in front. If it tilts toward the back of your head, your back will be shorter. Straight up from the center of your forehead creates the most balanced layers.
Hold the ponytail straight up with one hand. With your other hand, slide down to where you want to cut. Remember that your hair will shrink when it dries, so cut less than you think you need. You can always cut more later. A good rule is to cut half of what you think you want to remove.
Cut straight across the ponytail. Don’t angle the scissors. Just make one clean, straight cut. Use your sharp scissors and make one decisive snip rather than several small ones. Small snips can create an uneven line.
When you let your hair down, you’ll have beautiful, natural layers that frame your face. The layers will be shortest in the front and longest in the back. This creates a flattering shape that works for most face types.
This method works because your hair naturally falls at different lengths around your head. The hair at the front is shorter than the hair at the back when it’s all pulled forward. So cutting it all at one length creates graduated layers when it falls naturally.
After the cut, wet your hair again and let it dry naturally. This shows you the true result. If you want more layers or shorter length, you can repeat the process. Just remember to always cut less than you think you need.
The Curl-by-Curl Method: For Maximum Precision
If you want more precision and control, the curl-by-curl method is your best friend. It takes longer, but the results are incredibly customized to your specific curl pattern. This method is perfect for maintenance trims and fixing specific problem areas.
Start by dividing your hair into sections. Four sections work for most people: left front, right front, left back, right back. Clip up the sections you’re not working on. Some people prefer six or eight sections for more control. Do what feels right for your hair density.
Take one curl at a time. Hold it gently and look at where it naturally wants to fall. Don’t stretch it or pull it straight. Let it be itself. This is the key to the whole method. You’re respecting each individual curl.
Decide where you want that specific curl to end. Remember shrinkage. If you want it to hit your shoulder, cut it a bit past your shoulder. Most curls shrink up about half an inch to two inches depending on how tight they are. Tighter curls shrink more.
Make small snips. You can always cut more, but you can’t put hair back. Use the point-cutting technique where you snip into the curl vertically rather than cutting straight across. This creates a softer, more natural end that blends better with neighboring curls.
Point cutting also prevents blunt ends that can make curls look heavy or choppy. Angle your scissors so they point into the curl and make tiny snips. Each snip should only remove a small amount. This creates texture and movement.
Move from curl to curl, checking the length against neighboring curls. You’re not trying to make them all identical. You’re creating a balanced shape where each curl works together with the others. Some curls can be slightly longer or shorter. That’s natural and beautiful.
Work systematically. Don’t jump around your head randomly. Finish one section completely before moving to the next. This helps you maintain consistency and prevents you from losing track of what you’ve already cut.
As you work, step back and look at the overall shape in the mirror. Are you creating balance? Does one side look heavier than the other? Adjust as you go. This method gives you the control to fix issues immediately.
Trimming Bangs and Face-Framing Pieces
Bangs and the pieces around your face need special attention. These are the curls everyone sees first, so you want them to look intentional. Face-framing pieces can make or break your entire haircut.
For bangs, work with dry hair if possible. Curly bangs shrink dramatically, and cutting them wet almost always results in bangs that are too short. Let them dry in their natural pattern first. This is one exception to the damp hair rule.
Take one curl at a time. Hold it where it naturally falls against your face. Decide where you want it to end. Cut it slightly longer than that point. Test it by letting go and seeing where it bounces to. If it’s still too long, take a bit more off.
The safest approach is to start with bangs that hit your eyebrows or longer. You can always go shorter. But if you cut them too short on the first try, you’ll be waiting weeks or months for them to grow back.
Face-framing pieces follow the same rule. These are the curls right around your face from your temples to your jawline. They create the overall shape of your cut, so take your time with them. These pieces should gradually get longer as they move down your face.
Cut these pieces while looking straight ahead in the mirror. Don’t tilt your head down or up. You want to see exactly how they’ll frame your face in your normal posture. The way your head is positioned changes where the curls fall.
Consider your face shape when cutting face-framing pieces. If you have a round face, slightly longer pieces can elongate it. If you have a long face, shorter pieces at the cheekbone level can add width and balance.
Removing Bulk and Creating Internal Shape
Sometimes your curls don’t need length taken off. They just need thinning or shaping. This is where interior cutting comes in. It’s a game-changer for thick, heavy curls.
Interior cutting means cutting some of the inner layers of hair while leaving the outer layer longer. This removes weight and lets your curls bounce more freely without changing the overall length. You keep your length but lose the bulk that weighs you down.
Take a section of hair and gently pull it away from your head. Look inside the section. You’ll see shorter pieces and longer pieces all mixed together. The longer pieces are creating the outline of your hairstyle. The shorter pieces are underneath.
Snip some of those inner pieces shorter. This creates space inside your curl pattern. The curls have room to move and bounce instead of being packed tightly together. It’s like giving your curls breathing room.
Don’t go crazy with this. Make small adjustments. Cut a little, let it settle, then decide if you need more. Removing too much can make your hair look stringy instead of full. You want to reduce bulk, not eliminate all your volume.
This technique is especially helpful if you have thick, dense curls that tend to form a triangle shape. Removing some interior bulk lets the curls fall more naturally around your face. The triangle becomes a more flattering oval or round shape.
Interior cutting also helps if you have multiple curl patterns in your hair. Maybe the underneath is curlier and the top is wavier. Cutting some of the tighter curls shorter can help everything blend together better.
Addressing Common Problem Areas
Every curly-haired person has problem spots. Maybe the back of your head always looks flat. Maybe one side is curlier than the other. Let’s talk about fixing these issues.
If the back of your head looks flat, you probably need shorter layers in that area. Cut the back slightly shorter than the sides and front. This adds volume where you need it. Use a handheld mirror to see the back clearly while you cut.
If one side of your hair is curlier or thicker than the other, don’t try to make them identical. Instead, cut the thicker side slightly shorter. This balances the overall volume even though the sides aren’t the same.
For hair that sticks out at weird angles around the ears, identify those specific curls and cut them a bit shorter. They’ll blend better with the rest of your hair instead of creating lumps or bumps.
If you have a very defined curl pattern in most of your hair but some straight or wavy pieces mixed in, you can cut those differently. The straighter pieces often need to be cut slightly longer because they don’t shrink as much.
Common Mistakes to Avoid
Even with good instructions, there are pitfalls that catch people. Let’s talk about the biggest mistakes so you can avoid them and save yourself from regret.
The first mistake is cutting too much at once. Always start conservative. You live with your hair every day. You can trim more next week if needed. But if you cut too much today, you’re stuck waiting months for it to grow back. This is especially true if you’re trying a new technique.
Another mistake is cutting with hair that’s too wet. Soaking wet hair stretches longer than it naturally falls. When it dries, it shrinks up and you’re left with a cut that’s much shorter than you wanted. This is the most common mistake beginners make.
Don’t cut your hair bone dry either, especially if you have tight curls. Dry hair can be brittle and harder to cut cleanly. The scissors might pull or tear instead of creating a clean cut. Damp is the sweet spot for most curl types.
Avoid cutting in a rush. Set aside at least an hour, maybe two if this is your first time. Rushing leads to uneven cuts and regret. Put on some music, relax, and treat it like a self-care session. This should be enjoyable, not stressful.
Don’t use dull scissors. If your scissors pull at your hair or you have to saw back and forth to make a cut, they’re too dull. Dull scissors cause split ends and damage. Invest in sharp scissors and keep them sharp.
Finally, don’t compare your curls to someone else’s. Your curl pattern is unique. A technique that works beautifully on someone with loose waves might not work the same on tight coils. Adjust these methods to fit your specific hair.
What to Do After Cutting
You’ve made your cuts. Now what? The way you style your hair after cutting determines how well you’ll see the results. This step is just as important as the cutting itself.
Apply your normal styling products. Whatever you usually use, gel, mousse, cream, or leave-in conditioner, apply it now. Use the same amount you normally would. Scrunch your curls gently to encourage them to form their pattern.
Let your hair dry naturally or use a diffuser if you normally do. Don’t touch it while it’s drying. The more you mess with wet curls, the more frizz you create. Patience is hard but worth it. This is when you’ll see the magic happen.
Once your hair is completely dry, you can scrunch out any crunch if you used gel. Now you’ll see the true result of your cut. Your curls should feel lighter, bouncier, and more defined. The shape should be balanced and flattering.
If you notice any pieces that are longer than you want, you can do small touch-ups. Remember to cut them dry this time since you’ll see exactly where they fall. Take just a tiny bit off. You can always cut more tomorrow.
Take photos from multiple angles. This helps you see your cut objectively. Sometimes we’re too close to our own hair to judge it fairly. Photos also give you a record of what worked so you can repeat it next time.
How Often Should You Trim Your Curly Hair?
This depends on your hair goals and how fast your hair grows. Most curly-haired people benefit from a trim every three to four months. This keeps ends healthy and maintains your shape.
If you’re growing your hair out, you might stretch it to every five or six months. But don’t skip trims completely. Regular small trims prevent split ends from traveling up the hair shaft and causing more damage. A quarter inch trim every few months is better than a two inch cut once a year.
If you love a specific short style, you might need to trim every six to eight weeks to maintain the shape. Curly cuts grow out differently than straight cuts because the curls change the silhouette as they get longer. Short styles lose their shape faster.
Listen to your hair. If your ends start to feel rough or look stringy, it’s time for a trim. If your curls aren’t forming as nicely as they used to, a trim can refresh them. Sometimes old ends just get tired and won’t curl anymore.
The beauty of cutting your own hair is you can trim whenever you want. You don’t have to wait for an appointment or spend money. If you notice one weird piece, you can fix it immediately instead of living with it for weeks.
Building Your Confidence Over Time
Your first home haircut might not be perfect. That’s completely normal. Even professional stylists went through years of training to get where they are. Give yourself grace and remember you’re learning a new skill.
Each time you cut your hair at home, you’ll get better. You’ll understand your curl pattern more deeply. You’ll develop a feel for how much to cut and where. It becomes easier and faster. What takes two hours the first time might only take thirty minutes after you’ve done it a few times.
Start with small trims. Build your confidence with maintenance cuts before you try anything dramatic. Once you’ve done a few successful trims, you can experiment with more significant changes. Maybe add some face-framing layers or try bangs.
Join online communities of people who cut their own curly hair. You’ll find tons of support, tips, and encouragement. Seeing other people’s before-and-after photos can inspire you and show you what’s possible. These communities are full of people who understand the journey.
Remember why you started this. Maybe you wanted to save money. Maybe you wanted control. Maybe you were just tired of bad salon experiences. Keep that motivation in mind, especially when you feel nervous before your first cut.
Celebrate your wins. When you finish a successful cut, acknowledge it. You just did something that scares a lot of people. You took control of your hair and your appearance. That’s powerful.
When to See a Professional Instead
Home cuts work great for maintenance and small changes. But there are times when seeing a professional makes more sense. Knowing when to call in an expert is part of being smart about your hair.
If you want a dramatic change, like going from long hair to a pixie cut, see a professional. Big transformations are risky to do at home, and a mistake could be devastating. You only get one chance with a major cut like that.
If you want a very specific style that requires precise technique, a professional can execute it better. Things like undercuts, complex layering patterns, or asymmetrical cuts are best left to trained hands. These styles need expertise to look intentional instead of accidental.
When you’re dealing with significant damage, a professional can assess and create a plan. They can tell you how much needs to be cut and how to move forward with healthier hair. Sometimes you need an expert eye to evaluate the situation.
If you want color along with your cut, definitely see a professional. Cutting and coloring are two different skill sets. Attempting both at home on the same day is asking for trouble. Color changes how your hair behaves, and you need experience to navigate that.
And if you just want to be pampered, there’s nothing wrong with that. Home cuts are practical and empowering, but salon visits can be relaxing and special. You don’t have to choose one or the other forever. Many people do maintenance trims at home and bigger changes at the salon.
Maintaining Healthy Curls Between Cuts
Cutting your hair is just one part of healthy curl care. What you do between cuts matters just as much. Healthy hair is easier to cut and looks better after cutting.
Keep your ends moisturized. Dry ends are more likely to split and break. Use a good leave-in conditioner or oil on your ends daily. This protects them and extends the time between trims.
Avoid heat styling when possible. Heat damage makes curls lose their pattern and become harder to cut evenly. If you must use heat, always use a heat protectant first. Lower temperatures are safer than high heat.
Sleep on a silk or satin pillowcase. Cotton creates friction that damages hair and causes frizz. Silk or satin lets your hair glide smoothly while you sleep. This simple change can dramatically improve your hair health.
Don’t manipulate your hair too much. The more you touch, brush, and restyle throughout the day, the more you damage it. Set your style in the morning and leave it alone. Your hands can cause frizz and breakage.
Deep condition regularly. Once a week or every other week, use a deep conditioning treatment. This keeps your hair strong and elastic. Strong hair cuts better and holds its shape longer.
Final Thoughts
Cutting your own curly hair is one of the most empowering things you can do. It gives you control, saves you money, and helps you understand your hair on a deeper level. You become your own expert.
Take your time. Be patient with yourself. Start small and build your skills. Your curls are unique and beautiful, and learning to care for them yourself is a gift you give to your future self. Every cut teaches you something new.
Remember that mistakes are temporary. Hair grows back. Even if your first attempt isn’t perfect, you’ll recover. Most mistakes can be fixed with a small adjustment or hidden with strategic styling until things grow out.
The freedom of cutting your own hair is incredible. You can trim whenever you want. You can experiment without spending money. You can fix problems immediately instead of scheduling appointments weeks away. This independence changes your relationship with your hair.
Grab those scissors, trust yourself, and remember that hair grows back. You’re about to save yourself so much time, money, and frustration. And who knows? You might just discover that you’re really good at this. Many people find they cut their own curls better than any stylist ever did.
Your curls are unique. Your hands know them better than anyone else’s. Trust that knowledge. Be brave. Take that first snip. Welcome to the world of cutting your own curly hair. You’ve got this.

Hi, I’m Andrew Trust. For me, beauty has always been more than appearances—it’s about confidence, self-expression, and feeling your best every single day.
Over the years, I’ve explored, experimented, and discovered what truly works in hair and beauty. Not just trends or picture-perfect looks, but real techniques and tips that fit into everyday life and actually make a difference.
My goal is simple: to help you find the styles, routines, and little beauty tricks that bring out your best self—effortlessly and authentically. Beauty should feel enjoyable, empowering, and truly yours—and that’s exactly what I’m here to help you achieve.