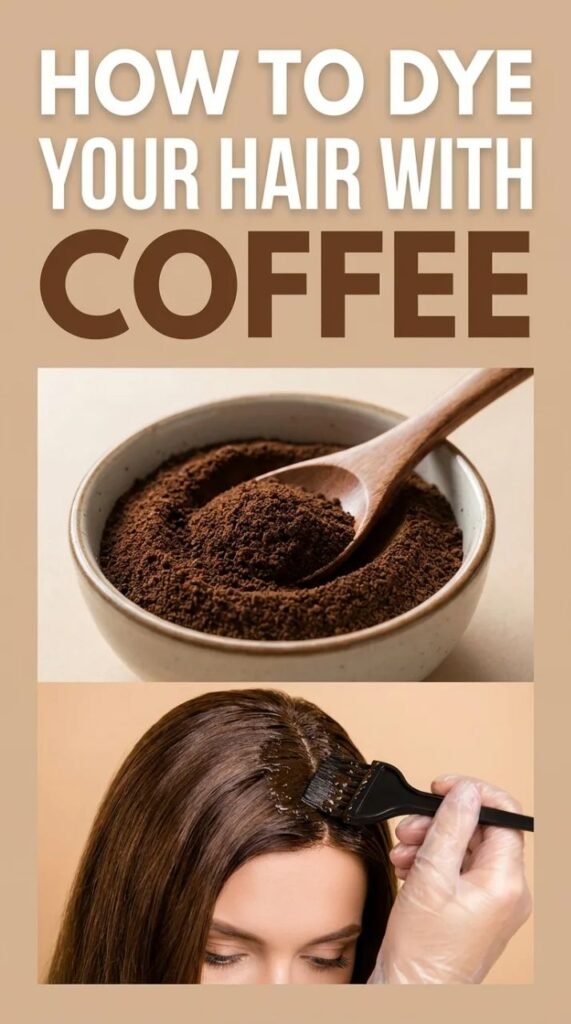
The idea that your morning brew can also color your hair sounds almost too simple to be real. But it genuinely works — and this guide will show you exactly why, who it works best for, how to do it properly at home, and what to realistically expect from the results.
Whether you’re curious, cautious about chemicals, or simply coffee-obsessed, you’ll find everything you need right here.
Quick Facts About Coffee Hair Dye You Should Know
Before you head to the kitchen, a few important things are worth understanding. Coffee hair dye doesn’t behave the same way on every head — your hair’s natural color, thickness, texture, and current condition all influence how well the color shows up and how long it lasts.
- If you’ve recently had a chemical color treatment or used a post-color sealer, the coffee dye may not show any visible effect. Synthetic dyes and silicone-based sealers create a coating around the hair shaft that blocks natural pigment absorption.
- Coffee works best on light brown, medium brown, and dark blonde hair. On very dark brown or black hair, the color shift will be minimal — though the conditioning and caffeine benefits still apply.
- Hair thickness matters more than most people realize. Thick hair generally has lower porosity, meaning it doesn’t absorb color as readily. Fine or thin hair absorbs it more easily and tends to show results faster.
- The stronger your coffee brew, the more pigment you’re depositing. Always use a dark roast brewed extra strong for the best color payoff.
- Coffee hair dye is not permanent. It typically lasts two to three days before starting to fade noticeably, and how often you wash your hair will directly affect how long the color holds between applications.
Going into this with the right expectations makes the whole experience more enjoyable. Think of coffee dye as a buildable, low-commitment color treatment rather than a box dye replacement — and you’ll be genuinely pleased with what it can do.
Should You Use Coffee Hair Dye?
The short answer is yes — especially if your hair has a light base tone. For those with light to medium brown or dark blonde hair, coffee dye can produce a beautifully warm, rich result that looks entirely natural.
For people with very dark brown or black hair, visible color change is unlikely, but the conditioning, shine-enhancing, and potential growth-stimulating benefits make the treatment worthwhile regardless.
It’s a Safer Alternative to Chemical Dyes
This is one of the most compelling reasons to consider coffee hair dye. Research has shown that commercial hair dye products can contain as many as 5,000 different chemicals — some of which have been found to be carcinogenic in animal studies.
Common concerns include APEs (alkylphenol ethoxylates) and PPD (phenylenediamine), compounds known to cause scalp irritation, allergic contact dermatitis, and pigmentation issues with repeated use.
Some individuals experience severe reactions to PPD in particular, even from a single exposure.
Coffee, by contrast, is entirely natural and non-toxic. You’re not introducing synthetic compounds to your scalp or your bloodstream through skin absorption. For people who color their hair frequently or who have sensitive skin, this distinction is significant.
Caffeine May Actually Stimulate Hair Growth
This is where coffee hair dye becomes genuinely interesting beyond just color. Multiple peer-reviewed studies have investigated caffeine’s effect on hair follicles, and the findings are encouraging.
Research has demonstrated that caffeine may stimulate hair growth by counteracting the effects of DHT (dihydrotestosterone), a hormone associated with hair follicle miniaturization and hair loss — particularly in androgenetic alopecia.
One clinical study involving female subjects with androgenetic alopecia evaluated a phyto-caffeine-containing shampoo over a six-month period.
Compared to a control shampoo, participants using the caffeine formula experienced a statistically significant reduction in the number of hairs lost during a standardized pull test
A separate study comparing a caffeine-based topical liquid to minoxidil 5% solution for male androgenetic alopecia found the caffeine treatment to be non-inferior — a striking result for a natural ingredient.
What this means practically: even if your coffee treatment doesn’t visibly shift your hair color on its first application, the caffeine is likely doing something beneficial for your scalp and follicles. That’s a benefit no synthetic box dye can offer.
It Conditions and Softens Hair
The anecdotal evidence here is strong and consistent. Many people who try coffee hair treatments — even those with dark hair who see little color change — report noticeably softer, shinier, and more manageable hair afterward. The antioxidants in coffee help strengthen the hair shaft and contribute to a natural sheen that looks healthy rather than product-coated.
Sierra Green, an actress and YouTuber who documented her experience with DIY coffee hair dye on her very dark hair, noted that while the color didn’t show on her already dark locks, her hair felt “super soft and luxurious” afterward — as if she’d had a professional conditioning treatment. This experience is widely shared among people who try the method, regardless of their hair color.
When you mix coffee with a deep conditioner as part of this treatment, you’re essentially creating a nourishing hair mask that also deposits color. Your hair receives care at every step of the process, which makes it genuinely different from the experience of using chemical dye.
How Coffee Works as a Hair Dye
Coffee contains natural compounds called tannins — polyphenolic plant compounds that give coffee its dark color, its characteristic bitter taste, and its slightly astringent quality.
When tannins come into contact with the hair shaft, they temporarily bind to the outer cuticle layer and deposit a soft, warm brown pigment. This is the same mechanism through which other tannin-rich plant materials — like black tea and walnut shells — have been used as natural dyes for centuries.
Unlike chemical dyes, coffee does not penetrate the inner cortex of the hair strand. It doesn’t swell the cuticle with a developer or oxidize the existing pigment.
This is precisely why the color isn’t permanent — it sits on the hair’s surface and gradually washes away as you shampoo. But it also means there’s no structural damage to your hair in the process, no risk of breakage from over-processing, and no need for a recovery period afterward.
When you use dark roast coffee, you’re working with a higher concentration of tannins compared to lighter roasts. Dark roast beans undergo a longer, hotter roasting process — passing well beyond the second crack point that occurs around 224°C — which develops a richer, denser pigment profile in the bean. This is why the type and strength of your coffee directly determines the quality of your color result.
What You’ll Need
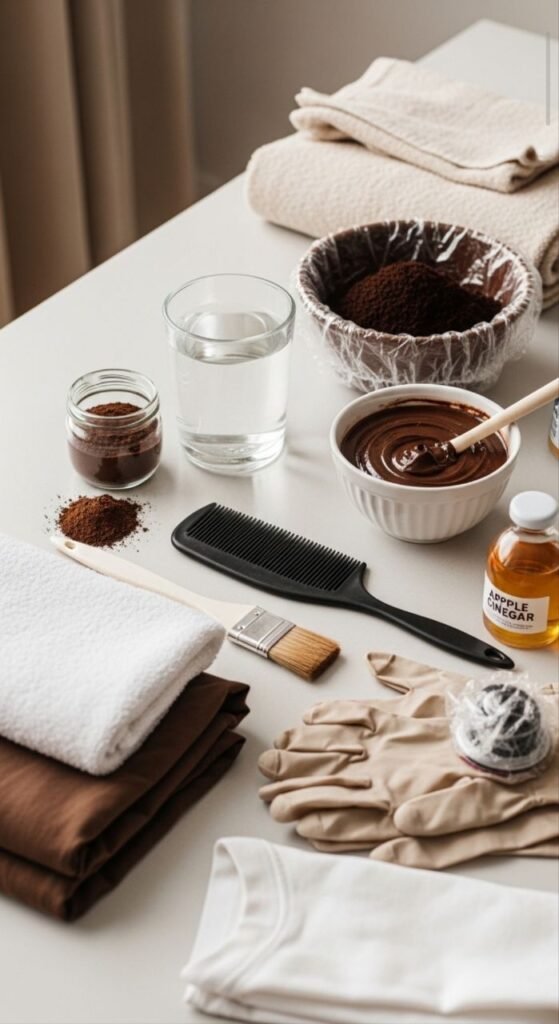
- 1 cup of organic dark roast or espresso coffee powder
- 2 cups of warm water (for brewing)
- 2 tablespoons of used coffee grounds (from your brewer after brewing)
- 2 to 3 tablespoons of a deep conditioner or hair mask
- A mixing bowl
- An applicator brush or wide-toothed comb
- A shower cap or plastic wrap
- Old towels and a shirt you don’t mind staining
- Gloves (optional but recommended)
- Apple cider vinegar for the finishing rinse (optional but beneficial)
Choose organic dark roast coffee if possible — it tends to have a cleaner tannin profile without added flavoring agents that could interfere with your color results or leave a sticky residue. Espresso powder works beautifully and is already ground very fine, which makes it easier to blend into a smooth, even treatment.
How to Prepare Your Coffee Hair Dye
Brewing Your Dye Base

Brew your dark roast coffee significantly stronger than you normally would. Use double the amount of grounds you’d typically use for the same volume of water — the goal is to produce an intensely dark, concentrated brew, closer to espresso in strength and depth than your regular morning cup. The more concentrated your brew, the more tannin-rich pigment you have to work with.
Once brewed, allow the coffee to cool completely to room temperature before you use it. Never apply hot liquid to your hair — beyond the discomfort, heat can cause damage to the hair shaft and makes a mess of the application process. Patience at this stage pays off.
Mixing the Treatment
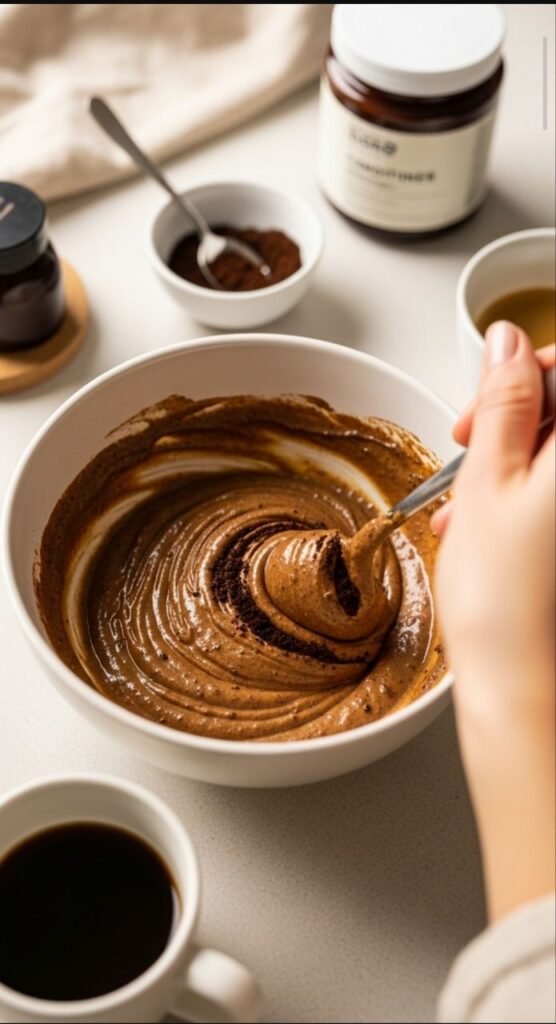
In your mixing bowl, combine the cooled coffee, the used coffee grounds, and your deep conditioner. Stir everything together until you have a uniform, slightly thick paste.
The conditioner serves two critical functions: it gives the mixture enough body to cling to your hair rather than running off, and it actively nourishes your strands throughout the treatment. The used grounds add a light physical texture that helps the mixture adhere even more effectively.
The final consistency should resemble a thick hair mask — easy to spread but substantial enough to stay put. If the mixture is too thin and runny, add more conditioner. If it’s too thick to spread comfortably, add a small splash of your brewed coffee to loosen it.
How to Apply Coffee Hair Dye: Step by Step
Step 1: Prepare Your Hair and Your Space
Wash your hair with shampoo and rinse thoroughly — but skip the conditioner at this stage. You want your hair clean and free of product buildup so the tannins can make direct contact with the hair shaft without any barrier.
Towel dry until your hair is damp, not soaking wet. Excess water will dilute the mixture and reduce its effectiveness; completely dry hair will absorb the treatment unevenly.
Put on an old shirt and drape old towels around your shoulders and over any nearby surfaces. Coffee stains fabric persistently — the stains don’t always wash out completely — so don’t take any risks with clothes or surfaces you care about.
Step 2: Section Your Hair
Using your wide-toothed comb, divide your hair into at least four sections: two in the front and two in the back. Secure each section with a clip.
If you have thick or very long hair, work with more sections. The more organized and methodical you are at this stage, the more even your color result will be across your entire head.
Step 3: Apply the Mixture
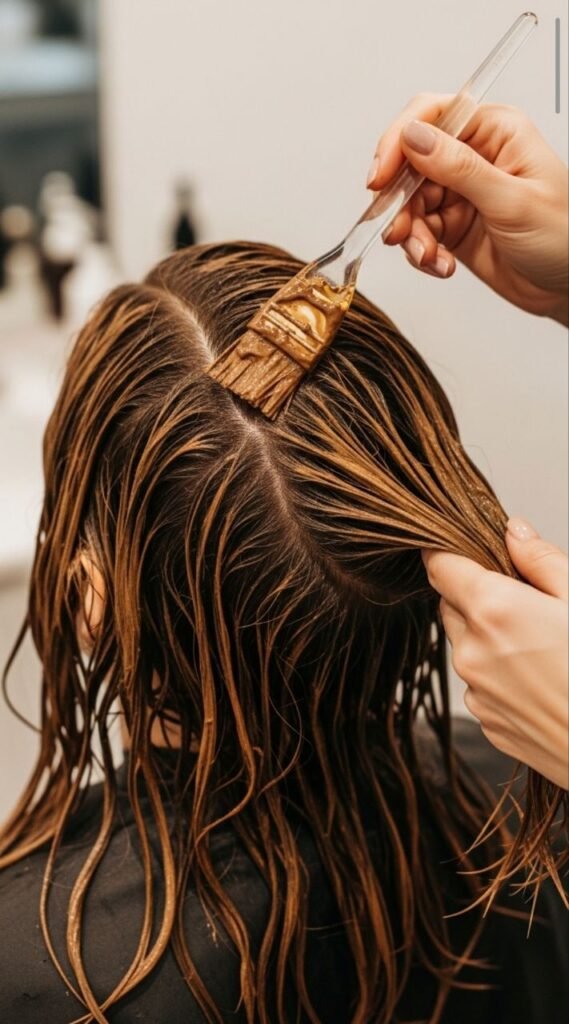
Starting with one section, use your applicator brush to coat the hair from roots to ends. Work generously — every strand should be fully saturated, not just lightly coated on the surface.
Massage the mixture into each section as you go, treating it the way you would a hair mask. Move through all sections until your entire head is covered.
Once all sections are done, do a final pass with your gloved fingers to press the mixture into any areas that feel less saturated. Pay particular attention to the ends, which are typically more porous and actually absorb coffee color more readily than the rest of the shaft.
Step 4: Cover and Process
Gather all your coated hair onto the top of your head and cover it fully with a shower cap or plastic wrap.
This keeps the mixture from drying out during processing and helps retain heat, which encourages the tannins to bind more effectively to the hair shaft. Leave the treatment on for a minimum of one hour. For a deeper, more noticeable result, leave it on for two hours.
For maximum color impact, you can leave the treatment on overnight. If you do this, make sure your shower cap is secure, and place an old towel over your pillow as protection. Many people find that an overnight coffee treatment produces their best results.
Step 5: Rinse Properly — This Step Matters
When your processing time is complete, rinse your hair thoroughly with cool water. This is important: do not use shampoo immediately after rinsing. Shampooing right away will strip the freshly deposited tannins before they’ve had a chance to fully set, dramatically reducing your color result. Rinse with water only until it runs completely clear.
For the best possible color retention, finish your rinse with diluted apple cider vinegar. Mix one part apple cider vinegar with two parts water and pour it slowly through your hair as a final rinse. The acidity helps seal the hair cuticle tightly, which locks in both the color and the moisture from the conditioner. It also adds a beautiful shine. The vinegar smell fades entirely as your hair dries — you will not smell it once your hair is dry.
An Alternative: The Dunk or Pour Method
If the section-by-section brush application feels like too much effort, there’s a simpler approach. Brew your coffee extra strong, let it cool completely, and pour it into a wide basin or large bowl.
Lean over and dunk your hair directly into the liquid, or slowly pour the coffee over your hair while bent over the sink. Make sure every strand is thoroughly saturated, then cover with your shower cap and process for at least an hour before rinsing with cool water.
This method is less precise but perfectly effective for an all-over treatment. It’s a good option for a relaxing weekend hair ritual when you’re not targeting specific areas.
What Results Can You Realistically Expect?
After your first treatment, most people with light to medium brown hair notice their color looks richer, slightly deeper, and warmer. The change is real but intentionally subtle — think of it as turning up the warmth and saturation of your natural color rather than switching to an entirely different shade.
On dark blonde hair, the shift can be more apparent, especially with consistent weekly application. Over two to four weeks, a noticeable warm brown depth develops that looks completely natural rather than dyed. For hair with gray scattered through brown, coffee softens the visual contrast between the two tones considerably, giving a blended, natural look that many people prefer to the harsh, solid coverage of permanent gray dye.
On very dark brown or black hair, visible color change from the tannin pigment is unlikely. But the conditioning and caffeine benefits remain fully present regardless of whether the color shows.
The color will begin fading after two to three shampoos and is largely gone within one to two weeks. This isn’t a flaw — it’s one of coffee dye’s most appealing qualities. There are no hard lines growing out, no awkward roots, and no commitment. The exit from coffee color is as gentle as the entry, which makes it ideal for people who want to experiment without pressure.
Common Mistakes and Why They Happen
The most frequent mistake people make is using too weak a coffee brew. A standard morning cup simply doesn’t contain enough tannin concentration to produce visible color. You need to brew specifically for this purpose — extra strong, dark roast, double the usual grounds for the same amount of water. If in doubt, add more coffee to your mixture.
Applying to completely dry hair is another common error. Dry hair absorbs the treatment unevenly, often producing patchy results that are darker in some spots than others. Always start with freshly washed, damp hair.
Skipping the conditioner is a mistake many first-timers make, assuming it’s optional. It is not. Without the conditioner, the coffee mixture has too little body to stay on the hair shaft long enough to deposit meaningful color — it simply runs off. The conditioner is the ingredient that makes this treatment functional.
Rinsing with hot water after the treatment is perhaps the most counterproductive mistake. Hot water aggressively opens the hair cuticle, causing the tannins to flush out before they’ve set. Always use cool or cold water for rinsing after a coffee treatment.
Using a light or medium roast coffee is also a common oversight. The roasting level directly affects tannin density and pigment concentration. Light roasts and medium roasts simply don’t have enough of what you need. Stick with dark roast or espresso every time without exception.
What to Do If Something Goes Wrong
If your color looks patchy or uneven after drying, don’t be discouraged. Simply repeat the application in a few days, paying extra attention to the lighter or less-saturated areas. Because the color is buildable and the method is entirely gentle, unevenness typically corrects itself over one or two follow-up treatments without any dramatic action needed.
If the result came out darker than you expected — which can happen on very porous or lightly colored hair — wash your hair with a clarifying shampoo two or three times over the following week. The coffee color fades without any harsh removal treatment. A clarifying shampoo simply accelerates what time and regular washing would accomplish on their own.
If your scalp feels irritated or itchy after the treatment, stop and do a patch test before trying again. Apply a small amount of the mixture to your inner wrist or behind your ear and wait 24 hours. A reaction to coffee at the scalp is rare but not impossible, particularly for people with very sensitive skin or existing scalp conditions like eczema or psoriasis.
Professional Tips That Improve Results Without Extra Effort
Introducing gentle heat during the processing time makes a meaningful difference to your color result. After covering your hair with the shower cap, wrap a warm towel around it or sit under a hooded dryer for the first 20 to 30 minutes of your processing time. Mild heat encourages the cuticle to open slightly, allowing the tannins to penetrate and bond more deeply rather than just sitting on the very outer surface.
Adding a teaspoon of apple cider vinegar directly into your coffee mixture — in addition to using it as a final rinse — can enhance color deposit. The acidic environment created by the vinegar is more favorable for tannin bonding. As noted, the smell disappears entirely once your hair dries.
If you want to add extra warmth specifically around the sections of hair that frame your face — a technique colorists use to make color look more intentional and flattering — apply the mixture to those front sections first. Let them process an extra 10 to 15 minutes before doing your full-head application. This gives the face-framing pieces more color time without over-darkening the rest of your hair.
For gray hair coverage, the combination of a two-hour processing time and an apple cider vinegar finish rinse gives the best possible result from a natural treatment. Don’t expect the same coverage as a permanent dye — but do expect a visible softening and blending of gray that many people find more flattering than solid coverage anyway.
Low-Maintenance Care to Keep Your Color Looking Good
To preserve your color as long as possible between applications, wash your hair with cool water and use a gentle, sulfate-free shampoo. Sulfates are the aggressive cleansing agents in many standard shampoos that strip both natural oils and surface color deposits simultaneously. A sulfate-free formula makes a real, noticeable difference in color longevity.
Deep conditioning your hair once a week also helps. Well-moisturized hair holds color better because a smooth, healthy cuticle releases deposits more slowly than a dry, rough, or damaged one. A simple coconut oil or shea butter treatment applied the night before your next shampoo session works beautifully — no expensive products required.
Try to avoid swimming in chlorinated water in the days immediately after a coffee treatment. Chlorine is particularly effective at stripping surface deposits and will accelerate fading noticeably. If you do swim, rinse your hair with fresh water immediately afterward and follow with a deep conditioning treatment as soon as possible.
There’s no harm in doing a coffee treatment as often as once or twice a week indefinitely. Because there are no harsh chemicals involved, the treatment never damages your hair regardless of frequency. Some people make a light coffee rinse a regular part of their weekly hair routine and simply enjoy the gradual buildup of warmth over time.
Quick Checklist Before You Begin
- Choose organic dark roast or espresso coffee powder for maximum tannin content.
- Brew extra-strong coffee using double the usual amount of grounds, then let it cool fully.
- Combine cooled coffee, used grounds, and deep conditioner into a thick, even paste.
- Shampoo hair with no conditioner, then towel dry to damp.
- Put on old clothes and protect your space with towels.
- Section hair into four or more parts and clip each section separately.
- Apply mixture generously from roots to ends using an applicator brush.
- Cover with a shower cap and process for one to two hours (or overnight for deeper color).
- Rinse thoroughly with cool water only — no shampoo immediately after.
- Optional but recommended: finish with a diluted apple cider vinegar rinse for extended color life and shine.
- Style as usual and air dry where possible for best results.
Do’s and Don’ts
- Do use dark roast or espresso — light and medium roasts won’t give you enough tannin pigment for visible color.
- Do brew it strong — this is the single most important variable in your results.
- Do include deep conditioner in the mixture — it’s what makes the treatment adhere and work effectively.
- Do apply to damp, freshly shampooed hair for the most even coverage.
- Do process for at least one hour, and aim for two hours or overnight for deeper, more lasting color.
- Do rinse with cool water to seal the cuticle and lock in color and moisture.
- Do use an apple cider vinegar final rinse to extend color life and add shine.
- Do repeat treatments once or twice a week consistently to build and maintain your color.
- Don’t expect results comparable to permanent chemical dye — this is a natural, buildable, surface-level tint.
- Don’t shampoo immediately after rinsing — it strips tannins before they’ve had time to set.
- Don’t rinse with hot water — it opens the cuticle aggressively and flushes the color out.
- Don’t apply to dry hair — it absorbs unevenly and produces patchy, inconsistent results.
- Don’t leave out the conditioner — the treatment won’t stay in your hair long enough to work without it.
- Don’t expect visible color results on very dark hair or hair recently treated with silicone-based products.
Frequently Asked Questions
Can I leave coffee in my hair overnight?
Yes, and it’s actually one of the most effective ways to use this treatment. Leaving coffee in your hair overnight gives the tannins more time to bind to the hair shaft, which can produce a more noticeable color result than a one-hour application. Just make sure your shower cap is secure to prevent drying out, and cover your pillow with an old towel as a precaution against staining.
Does coffee hair dye wash out completely?
Yes, completely. Coffee hair dye is not permanent and fades gradually with regular shampooing. It typically starts becoming visibly lighter after two or three washes and is largely gone within one to two weeks. A clarifying shampoo will speed the process significantly if you want to remove it more quickly. There are no lasting effects on your natural hair color.
How long does coffee take to visibly change hair color?
You may notice a subtle change after just one application, but the full, built-up effect develops over several treatments across two to four weeks. The color works cumulatively — each application deepens what the previous one deposited. Don’t assess the method by a single session; the results improve meaningfully with consistency.
How often can I apply coffee hair treatment?
Once or twice a week is ideal for building color. Once you’ve reached the depth you want, once every one to two weeks will maintain it. Because no harsh chemicals are involved, there is no risk of over-processing, so you can apply as frequently as suits your routine without concern for damage.
Can coffee hair dye help cover gray hair?
Coffee can significantly reduce the visibility of grays by depositing warm brown tones over lighter strands. It won’t fully cover gray the way permanent dye does, but it softens the contrast between gray and your natural color, creating a blended, dimensional look. Many people prefer this effect to stark, solid coverage. For the best results on gray hair, use a two-hour processing time and finish with the apple cider vinegar rinse.
Is coffee hair dye safe for chemically colored or highlighted hair?
Generally yes, though there are nuances. If your hair has recently been treated with silicone-based post-color products, wait until after a few washes before applying coffee dye — the silicone film will block absorption. On highlighted or bleached sections, coffee is absorbed more readily and creates a warm, natural-looking dimension that many people find beautiful. Just be aware that bleached sections may pick up more color than your natural hair, which can look intentionally dimensional or require balancing depending on your preference.
Does coffee hair dye cause any damage?
No. Coffee does not alter the internal structure of the hair shaft, does not require a developer or oxidizing agent, and does not swell or permanently open the cuticle. The treatment is inherently nourishing because of the conditioner in the mix and the antioxidant properties of caffeine. Your hair is being colored and conditioned simultaneously — the opposite of what most chemical color processes do.
Does the coffee smell stay in my hair after rinsing?
Not if you rinse thoroughly. Take your time at the sink and rinse until the water runs fully clear. The coffee scent fades entirely as your hair dries — you will not notice it once your hair is dry. If you find the smell unpleasant during the treatment itself, adding a few drops of vanilla extract or a light essential oil like lavender to your mixture makes the experience much more pleasant without affecting your color results.
Conclusion
Coffee hair dye is one of those rare beauty treatments that manages to be simple, safe, effective, and good for your hair all at once. It gives you real, buildable color results, conditions your strands during the process, delivers potential caffeine-driven benefits to your scalp and follicles, and keeps you away from the harsh chemicals that dominate conventional hair dye products.
The essentials are straightforward: brew dark roast coffee extra strong, include deep conditioner in your mixture, apply to damp hair, process for at least an hour, and always rinse with cool water. Add the apple cider vinegar rinse if you want your color to stay as long as possible, and build your results through consistent weekly applications.
This is not a replacement for every hair coloring need — but for warming up your natural tones, softening the look of grays, and giving your hair a nourishing treatment in the process, it’s genuinely one of the best options available. You already have the ingredients. Now you have the knowledge. Go make something good.

Hi, I’m Andrew Trust. For me, beauty has always been more than appearances—it’s about confidence, self-expression, and feeling your best every single day.
Over the years, I’ve explored, experimented, and discovered what truly works in hair and beauty. Not just trends or picture-perfect looks, but real techniques and tips that fit into everyday life and actually make a difference.
My goal is simple: to help you find the styles, routines, and little beauty tricks that bring out your best self—effortlessly and authentically. Beauty should feel enjoyable, empowering, and truly yours—and that’s exactly what I’m here to help you achieve.